Groups and Smart Groups
Groups and Smart Groups greatly help you to organize your items. To create a new group or smart group click on the “+”-button in the toolbar.
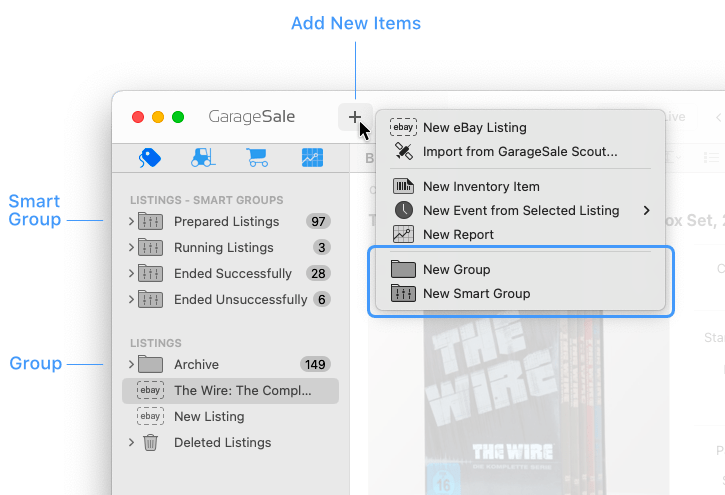
Groups
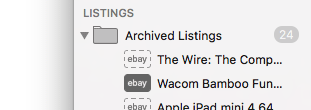
You can put items into groups manually by using drag and drop.
- Renaming a group: To rename a group highlight it, then perform a short click on the group title.
- Sorting a group: To sort the content of a group right-click on it and select “Sort by title” or “Sort by state”. (Holding down the option key while choosing “Sort by title” from the listing section’s outline view context menu sorts listings in reverse order.)
Smart Groups
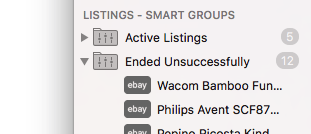
Thanks to smart groups you can easily manage and organize your listings, inventory items and orders.
A smart group is an “intelligent” group that filters your items by the selected criteria.
The content of Smart Groups is updated automatically - you can’t put items manually into a smart group. It contains aliases of your items - your original items won’t be moved.
- Changing settings: You can change the smart group settings whenever you want. To do so just doubleclick the smart group icon to open the settings window. (If you hold down the option/alt key while opening the smart group editor, all values in the property popups are sorted alphabetically.)
- Renaming a smart group: You can rename it in the smart group settings or you highlight it in the outline view sidebar, then perform a short click on the group title.
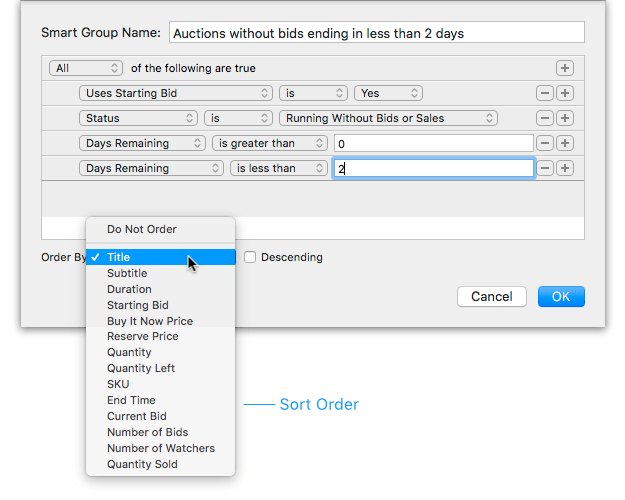
- Sorting a smart group: Smart Groups can be sorted by using the “Order By:” menu in the settings.
- Revealing original item: To easily jump to the original of an item displayed in a smart group, right-click on it and select “Reveal Original”.
- Duplicating a smart group: Right-click on a smart group and select the “Duplicate Smart Group” command.
Example smart group: Sometimes it’s helpful to get an overview of all running auctions that don’t have bids yet so you can take action and e.g. decrease the starting bid. Create a new smart group and setup the following criteria:
Advanced Smart Group Options
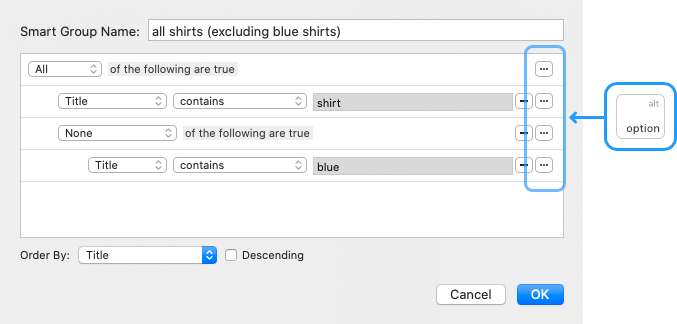
When holding down the option key on your keyboard the “+” buttons change to a “…” button. If you click this “…” button a “nested” rule is added which allows you to create advanced smart group settings. As an example you can use it to add a kind-of “does not contain” rule, e.g. a smart group that shows all “shirt” listings, excluding “blue” shirts.
| << Accounts Window | Search Field >> |