Customize Packing Slips
Overview
You can create your own packing slips, shipping labels and address labels or customize the built-in ones. GarageSale’s packing slips can be created by using simple HTML code so all you need is a text editor and basic knowlegde of HTML.
A packing slip design is a simple HTML file with a “.html” suffix. It contains ordinary HTML code with added command placeholders to include properties (e.g. buyer address, item title, item ID) of the current order.
To get an idea how it works or to create customized versions of the built-in packing slips, you can download the HTML files of the built-in slips here: Download built-in packing slips and labels
Object Placeholders and Example Code
The following placeholders can be used inside a packing slip’s HTML file:
| Property Name | Type | Value |
|---|---|---|
| [[order.htmlShippingAddress]] | String | The buyer’s shipping address |
| [[order.htmlShippingAddressWithSpanElements]] | String | The buyer’s shipping address (each field is inserted in its own span element) |
| [[order.orderDate]] | String | The date of the order |
| [[transaction.auctionTitle]] | String | The title of the ordered item |
| [[transaction.itemID]] | String | The item ID of the ordered item |
| [[transaction.sku]] | String | The SKU of the ordered item |
| [[transaction.quantityPurchased]] | String | The quantity of the ordered item |
| [[transaction.thumbImagePath]] | String | The image URL of the ordered item |
| [[transaction.positionInOrder]] | Integer | The position of the ordered item |
| [[transaction.listing.userProps.foo]] | String | A specific User Property from the ordered item |
Important: It’s required to add “loop” placeholders for orders and transactions. Please see the example code below:
<!DOCTYPE html>
<html>
	<head>
		<title>My Own Packing Slip</title>
		<style type="text/css">
			body {margin: 0; padding: 0; font-family: Helvetica, sans-serif; font-size: 9pt;}
			.packingSlip {margin: 40pt; page-break-after: always;} /* adds a page break after each order */
			.packingSlip:last-of-type {page-break-after: avoid;} /* avoids printing an empty page */
		</style>
	</head>
	<body>
		[[foreach order orders ordersLoop]] <!-- Start Order Loop -->
		<div class="packingSlip">
			<h1>[[order.htmlShippingAddress]]</h1>
			<h2>[[order.orderDate]]</h2>

			[[foreach transaction order.transactions transactionsLoop]] <!-- Start Transaction Loop -->
			<p><img src="file://[[transaction.thumbImagePath]]"></p>
			<p>Quantity: [[transaction.quantityPurchased]]</p>
			<p>Title: [[transaction.auctionTitle]]</p>
			<p>Item ID: [[transaction.itemID]]</p>
			<p>SKU: [[transaction.sku]]</p>
			[[endforeach transactionsLoop]] <!-- End Transaction Loop -->

			<footer></footer>
		</div>
		[[endforeach ordersLoop]] <!-- End Order Loop -->
	</body>
</html>
If needed, you can also add your own image files, e.g. your own banner image, like this:
<img src="myImage.jpg">
To learn more about GarageSale’s macro commands, please see the chapter Design Template Language.
Locating and Storing Custom Packing Slips
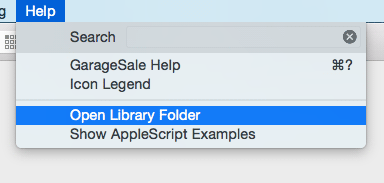
Once you’ve created your own packing slip HTML file you need to add it to GarageSale’s library folder. To do so select “Open Library Folder” from GarageSale’s Help menu.
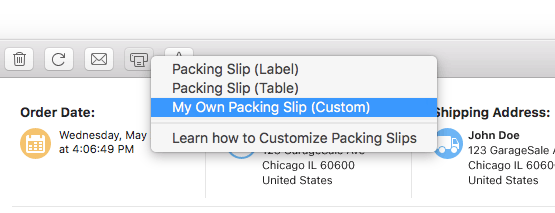
In that Finder window create a new folder called “PackingSlips” (if not there already) and save your custom html file(s) and corresponding image files (if used) there. Afterwards your custom packing slip(s) should be available in GarageSale:
| << Creating Own Listing Designs | Introducing The New Preview Mode >> |