Scheduler Groups
Scheduler Groups simplify timed, recurring listing starts. Just add upload time ranges to any group in Listing mode.
Let’s say you always want to start your listings prepared up to that point once a week on a Sunday at around 4:00PM. Instead doing it manually or creating a new event each time in GarageSale’s Scheduler window, you just setup a Scheduler Group once!
The scheduler group will automatically start the containing listings at the set time range.
This allows you to just add all the listings that you prepared during the week to the scheduler group. At the scheduled time the listings will automatically be launched without any further ado. (You just have to make sure that your Mac and GarageSale is running.)
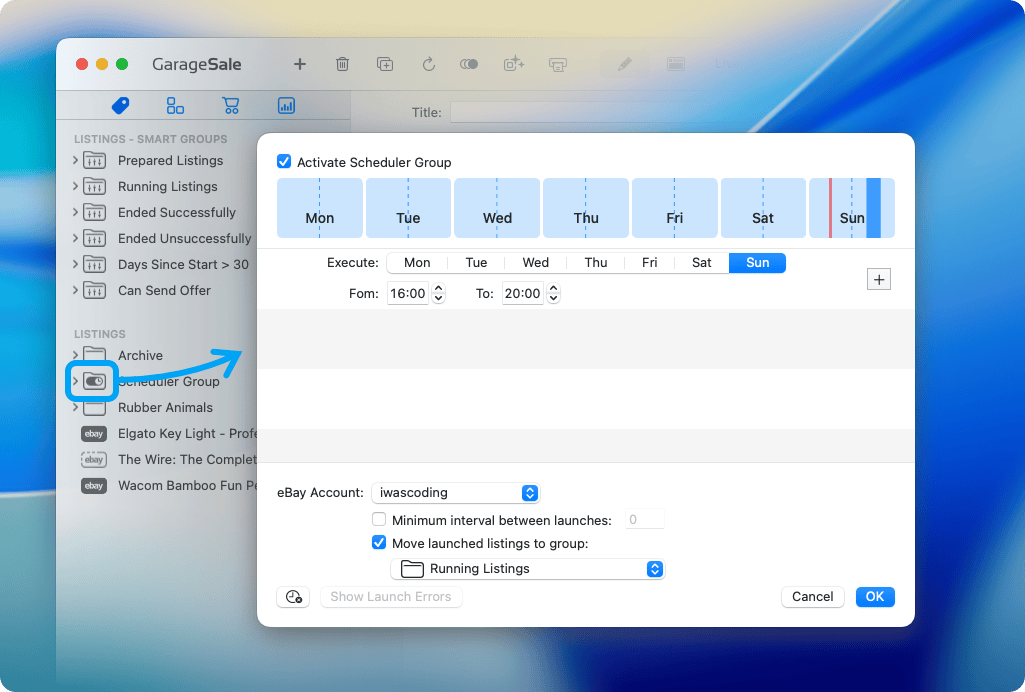
Setting Up a Scheduler Group
1. Create a Scheduler Group
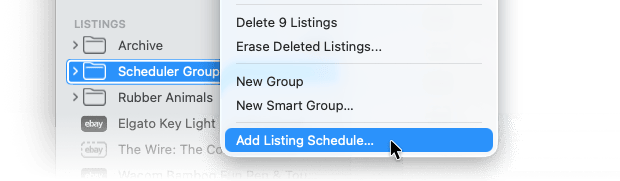
To create a scheduler group control-click on any regular group in the Listings section and select “Add Listing Schedule…”.
2. Set a Time Range
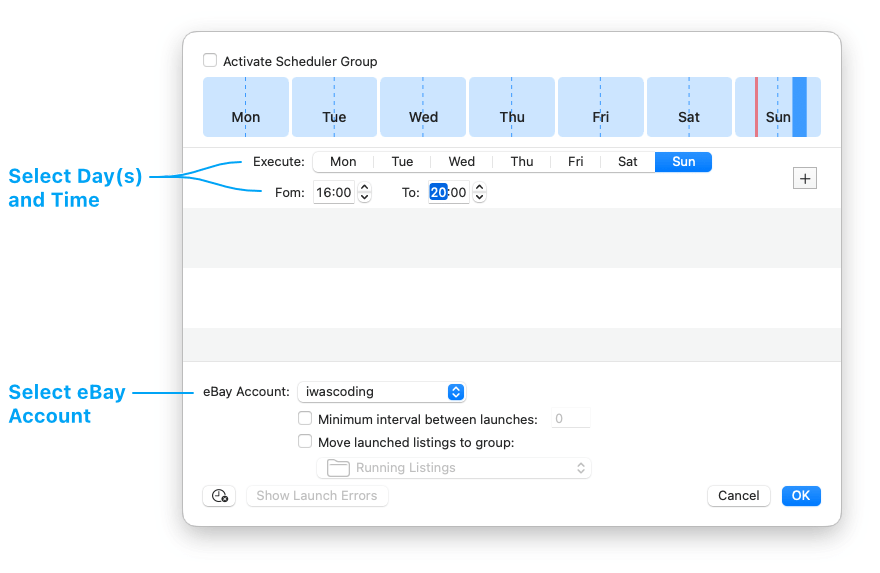
In the scheduler group’s configuration panel you can define one or even more time ranges. For example you can define Sunday from 4:00PM to 8:00PM as a time range. Listing launches will then be executed at that day/time.
If you have multiple eBay accounts don’t forget to select the desired eBay account!
3. Activate the Scheduler Group
Once your configuration is fully set up, select the “Activate Scheduler Group” checkbox at the top.
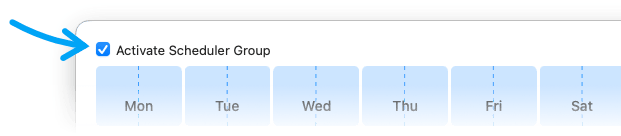
Your scheduler group is “hot” now and the group icon will change to the scheduler group activated icon:

Whenever the current day/time matches the scheduled group time window, GarageSale will try to upload prepared listings in your scheduled group.
Editing a Scheduler Group
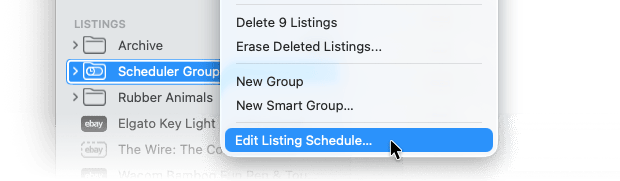
You can edit a scheduler group at any time. Just double-click on a scheduler group in the left outline view to re-open its configuration panel. Another way is to right-click on it and select “Edit Listing Schedule…” from the context menu.
Pausing a Scheduler Group
To “pause” an activated scheduler group, simply open the configuration panel and unselect the “Activate Scheduler Group” checkbox at the top, then click “OK”.
The scheduler group activated icon will then change to a scheduler group inactive icon:

Removing Listing Schedule From a Group
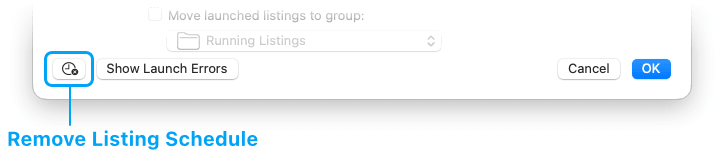
Double-click on a scheduler group in the left outline view to open its configuration panel, then click on the Remove button in the bottom left corner:
Launch Errors
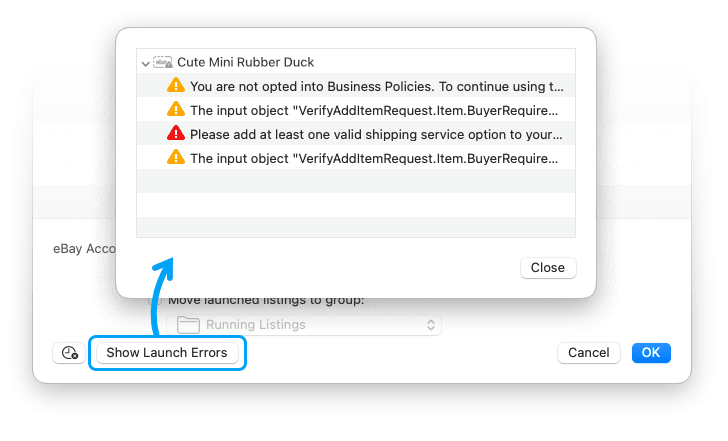
Listings that received errors during the launch attempt will be highlighted with an error icon:

To find out what launch errors ocurred, just click on “Show Launch Errors”. This panel lists all error messages:
Good to know
- Only prepared listings (not yet started listings) will be launched.
- Your Mac and GarageSale have to be running in order to launch your listings.
- When a scheduler group is in its “upload phase” the icon will change. Be aware: Each listing you add during this phase can be launched immediately.

| << SKU Generator | Cross Promotion >> |